Creating SSRS Report Without Using Wizard In SQL Server 2008
In this article I tell you how to create SSRS report without using wizard.
In this article I tell you how to create SSRS report without using wizard. You can create SSRS report in two ways.
- Designing a report using Report Wizard.
- Designing a report without using Report Wizard.
In my previous article, we created a report using the wizard. You can follow through my article at given URL: Create Reports Using Report Wizard In SQL Server 2008. Here I explain you how to create report without using wizard. Let us see step by step process:
Step 1
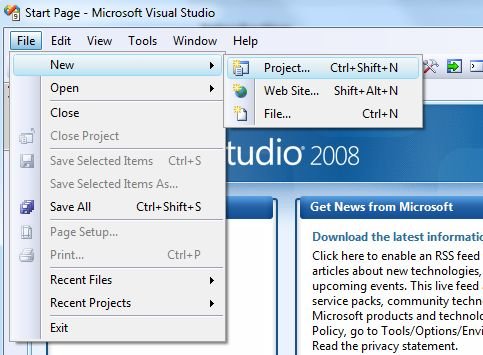
First, open Business Intelligence Development Studio and create a new project shown in the following image. You can use shortcut Ctrl + Shift + N keys to open a new project.
Step 2
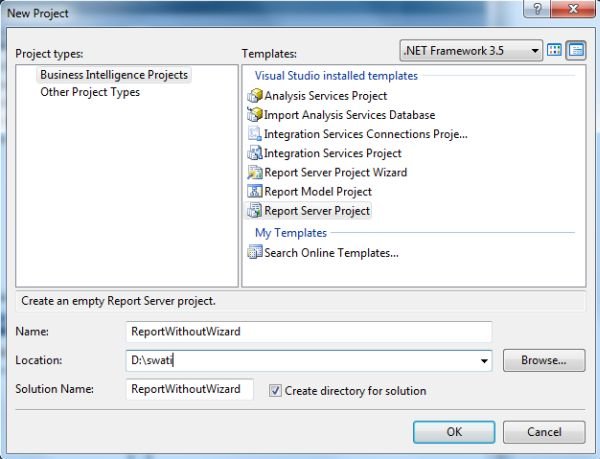
To create a report select Report Server Project Wizard and provide a name to the project as shown below. Click on OK.
Step 3
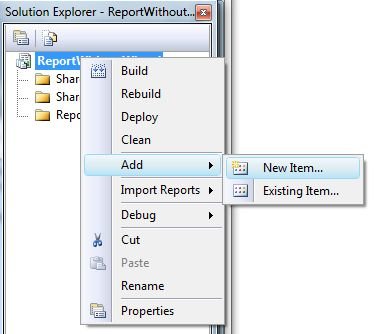
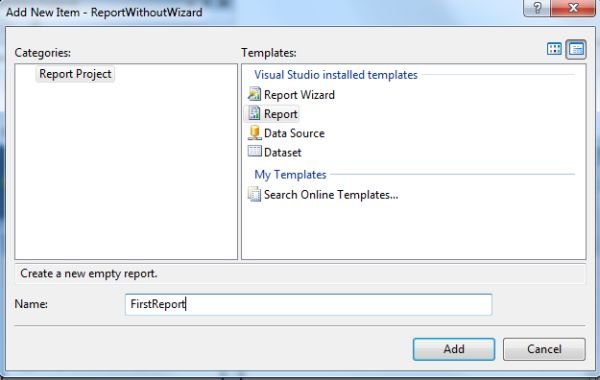
Right click on the report on the right hand side (see in Solution Explorer), select ADD -> New Item as shown in the following image.
Now select Report from the list of available items. Give it to the valid name and click OK.
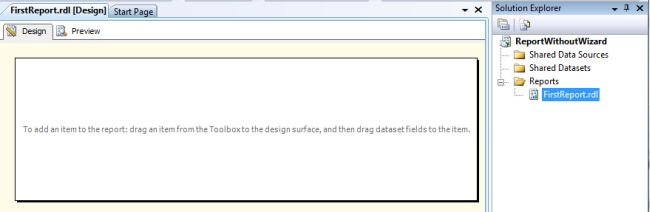
Step 5
Report is added to the project, see the report designer shown in the following image.
Step 6
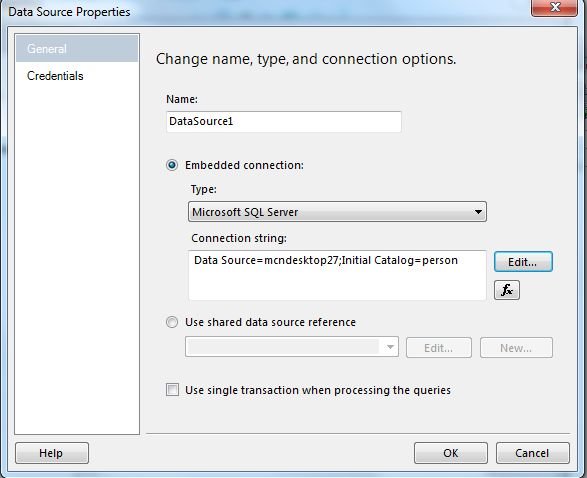
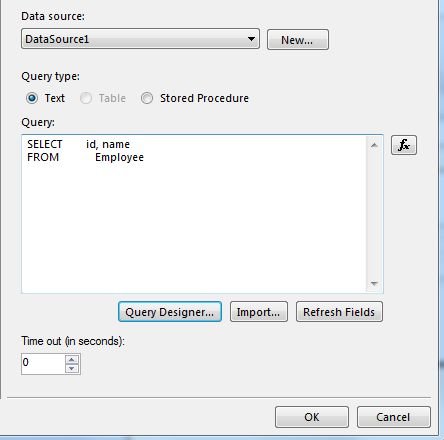
Go to Tool Box, then drag and drop a table. Now configure the data by creating a data source. To create data source, click New button. New window i.e. Dataset Properties will open. Provide the details about connection string and click OK, shown in following image.
Step 7
This will open a old window with the data source available to retrieve the data for creating report. Click on Query Designer.
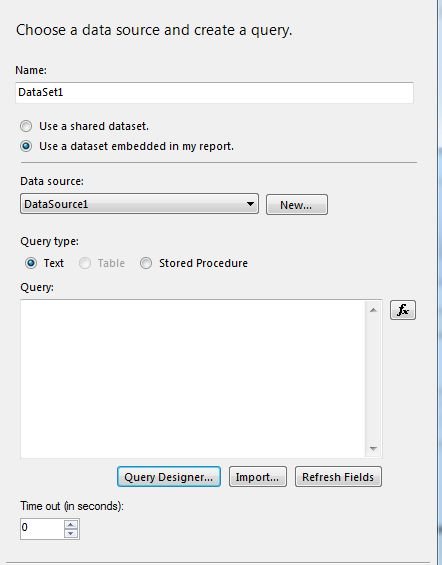
Execute the query to fetch data. and click OK.
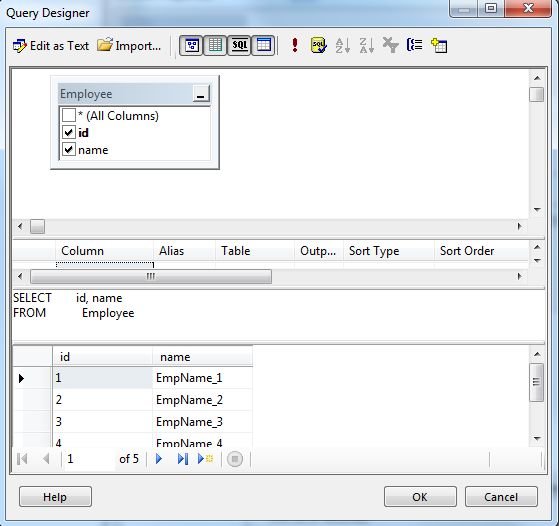
Previous window will open where you can see select query to fetch the records as shown in following image. Click OK to close the wizard.
Step 8
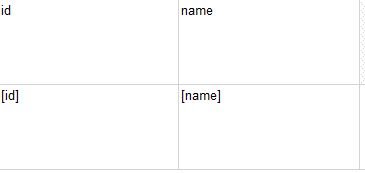
Table is created in the designer view shown in following image. Now select which column should be displayed in which part of the report. Select the cell and click at right side corner of the cell and select which column should be shown in this cell.
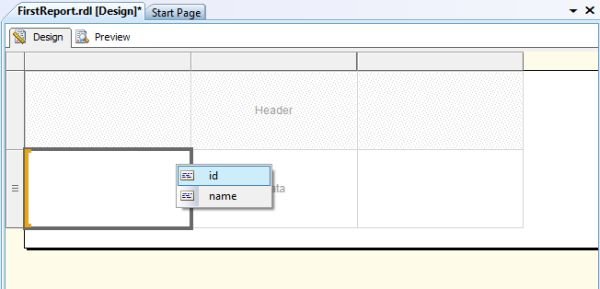
With the same process select remaining columns according to your requirement.
Step 9
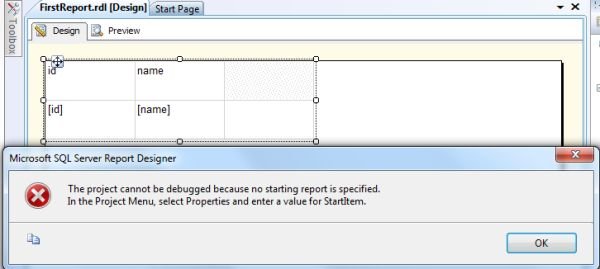
Execute the project by pressing F5. You will se, an error is occurred and project is not executed, shown in following image.
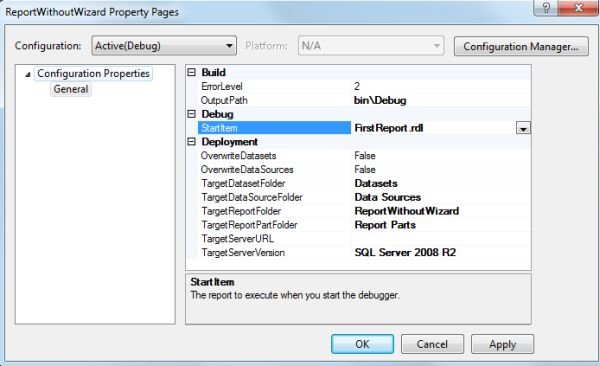
Select properties of Report by doing right click on ReportWithoutWizard in Solution Explorer. Set the StartItem property and click OK as shown in following image.
Step 10
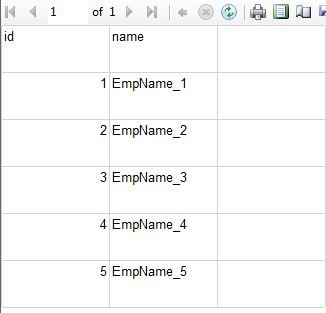
Again execute the project. This will generate the report and result is displayed.