Here we see how to create TextBox control and also explains various properties of the textbox control in xaml.
TextBox control
TextBox is the control which accepts user input. By default we can enter up to 2048 characters in a TextBox but if the Multiline property is set to True we can enter up to 32KB of text.
Creating a TextBox in XAML
<TextBox Height="23" HorizontalAlignment="Left" Margin="10,10,0,0" Name="TextBox1" VerticalAlignment="Top" Width="178" Text="" TextWrapping="WrapWithOverflow" />
The Height and Width attributes sets the height and width of text box.

Figure1.gif
Important property
The TextBox control has some important property.
Width - Width attributes of the TextBox element represent the width of a TextBox.
Height - Height attributes of the TextBox element represent the height of a TextBox.
Text - Text property of the TextBox element sets the content of a TextBox.
Background - The Background attributes set the background colors of text box.
Foreground - The Foreground attributes set the foreground colors of text box.
TextWrapping - The TextWrapping attributes sets the wrapping of text.
Scrolling Text - VerticalScrollBarVisibility and HorizontalScrollBarVisibility sets the vertical and horizontal scroll bars visible.
IsReadOnly - IsReadOnly attribute to true makes the text box non editable.
Restricting Text Size of a TextBox
The MaxLength property of the TextBox sets the number of characters allowed to input in a text box.
MaxLength="100"
Setting Background and Foreground Colors.
The Background and Foreground attributes set the background and foreground colors of text box. The following code sets background color as red and foreground color as yellow for the text box.
<TextBox Height="23" HorizontalAlignment="Left" Margin="128,90,0,0" Name="TextBox1" VerticalAlignment="Top" Width="180" Text="Rohatash Kumar" TextWrapping="WrapWithOverflow" Background="Crimson" Foreground="Blue" />
The form looks like this.
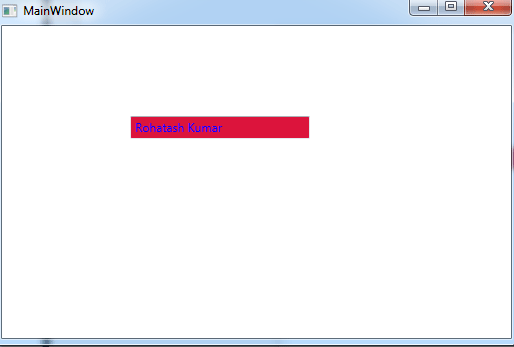
Figure2.gif
Setting the background image
<TextBox Height="109" HorizontalAlignment="Left" Margin="128,90,0,0" Name="TextBox1" VerticalAlignment="Top" Width="180" Text="Rohatash Kumar please enter something in the textbox" TextWrapping="Wrap" HorizontalContentAlignment="Center" HorizontalScrollBarVisibility="Auto" VerticalScrollBarVisibility="Visible">
<TextBox.Background>
<ImageBrush ImageSource="/WpfApplication69;component/Images/file5.jpg" />
</TextBox.Background>
</TextBox>
The form looks like this.
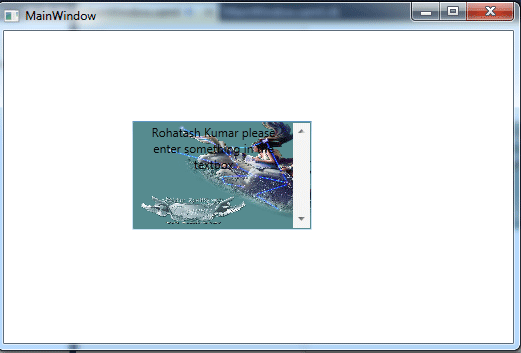
Figure3.gif