The Image class provides three static methods to create an Image object: FromFile, FromHbitmap, and FromStream.
- FromFile creates an Image object from a file.
- FromHbitmap creates an Image object from a window handle to a bitmap
-
FromStream creates an Image object from a stream of bytes (in a file or a database
 ).
).
For example, in the following line, FromFile constructs an Image object. Here curFileName is a string variable that holds the filename:
Dim curImage As Image = Image.FromFile(curFileName)
Drawing an Image
After creating an Image object, you'll want to view the image. GDI+ and Windows Forms offer many ways to view images. You can use a Form, PictureBox, or Button control as a container to view images. In most of our sample, we will draw an image on a graphics surface (a form).
Tip: You can also use a picture box to view images. The PictureBox control is easy to use, but using a form as a viewer provides more control and flexibility. For instance, use a PictureBox control when you do not need to manipulate or resize images. If you need to manipulate images using operation such as zooming in and zooming out, scaling, and skewing, use a Form object as the container because it is easy to change the size of Form. Later in this article you will see how to use a picture box to draw images.
The DrawImage method of the Graphics class is used to draw an image. It has 30 overloaded forms. The simplest form of DrawImage takes an Image object and the starting point where it will be drawn. You can also specify the area of a rectangle in which the image will be drawn. GraphicsUnit and ImageAttributes are optional parameters, which we will discuss later in this article.
The following code snippet creates an Image object from a file, and draws the image using the DrawImage method. The starting point of the images is (10,10). You can put this code on the form's paint event handler.
Dim g As Graphics = e.Graphics
Dim curImageAs Image = Image.FromFile(curFileName)
g.DrawImage(curImage, 10, 10)
The following code will fit an image into a rectangle that starts at point (10,10) and has a width of 100 and a height of 100.
Dim g As Graphics = e.Graphics
Dim curImage As Image = Image.FromFile(curFileName)
Dim rect As New Rectangle(20, 20, 100, 100)
g.DrawImage(curImage, rect)
If you want to fill the entire form with an image, you can use the ClientRectangle property of the form as the default rectangle.
Dim g As Graphics = e.Graphics
Dim curImageAs Image = Image.FromFile(curFileName)
g.DrawImage(curImage, Me.ClientRectangle)
Before we write code for the menu items event handler, we define string and Image type variable in the application scope. Add the following at the beginning of the class:
'User-defined variable
Private curFileNameAs String =Nothing
Private curImageAs Image = Nothing
Listing 7.1 shows the code for the OpenFileMenu click event handler. We use OpenFileDialog to browse images and save the file name in the string variable after the user selects a file. Thus we create an Image object from the selected file by using Image.FromFile. We also call Invalidate, which forces the form to repaint and call the paint event handler, where we will be viewing the image.
LISTING 7.1: The OpenFileMenu click event handler
Imports System
Imports System.Collections.Generic
Imports System.ComponentModel
Imports System.Data
Imports System.Drawing
Imports System.Linq
Imports System.Text
Imports System.Windows.Forms
Imports System.Drawing.Imaging
Public Class Form1
Private Sub Form1_Paint(ByVal sender As System.Object, ByVal e As System.Windows.Forms.PaintEventArgs) Handles MyBase.Paint
'Create OpenFileDialog
Dim opnDlg As New OpenFileDialog()
'Set a filter for images
opnDlg.Filter = "All Image files|*.bmp; *.gif, *.jpg, *.ico;" & "*.emf;, .wmf|Bitmap files (.bmp; *.gif; *.jpg;" & "*.ico) |*.bmp; *.gif; *.jpg; *.ico|" & "Meta Files(*.emf;*.wmf;*.png) | *.emf; *.wmf; *.png"
opnDlg.Title = "ImageViewer : Open Image File"
opnDlg.ShowHelp = True
'If OK, selected
If opnDlg.ShowDialog() = DialogResult.OK Then
'Read current selcted file name
curFileName = opnDlg.FileName
'Ceate the Image object using Image.FromFile
Try
curImage = Image.FromFile(curFileName)
Catch exp As Exception
MessageBox.Show(exp.Message)
End Try
End If
'Repaint the form, which forces the paint event handler
Invalidate()
End Sub
End Class
Now we write the Graphics.DrawImage method on the form's paint event handler. You can write a paint event handler from the Properties window of the form by double-clicking on the paint event available in the events list. Listing 7.2 shows our code, which simply calls DrawImage, using the default rectangle coordinates as AutoScrollPosition, and the image's width and height.
LISTING 7.2: The paint handler of the form
Imports System
Imports System.Collections.Generic
Imports System.ComponentModel
Imports System.Data
Imports System.Drawing
Imports System.Linq
Imports System.Text
Imports System.Windows.Forms
Imports System.Drawing.Imaging
Public Class Form1
Private Sub Form1_Paint(ByVal sender As System.Object, ByVal e As System.Windows.Forms.PaintEventArgs) Handles MyBase.Paint
End Sub
Private Sub Form1_Paint(ByVal sender As Object)
Dim g As Graphics = e.Graphics
If Not curImage Is Nothing Then
'Draw image using the DrawImage method
g.DrawImage(curImage,
AutoScrollPosition.X,
AutoScrollPosition.Y,
curImage.Width,
curImage.Height)
End If
End Sub
End Class
Now we're ready to view images. Compile and run the application, use the Open File menu item to select an image file, and the program will view it. In Figure 7.4, we open a file called 031.jpg.
FIGURE 7.4: Browsing a file
=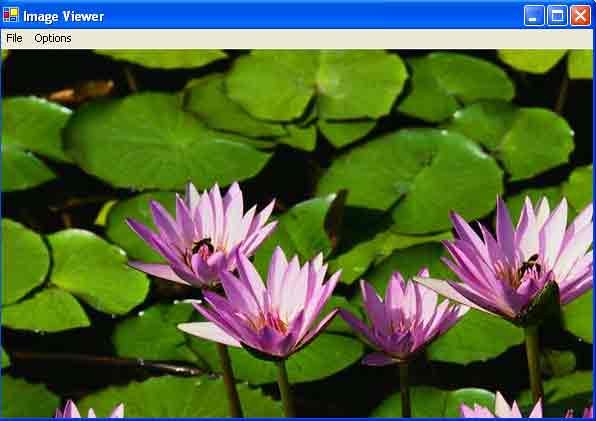
FIGURE 7.5: Viewing an Image
Clicking the Open button brings up the file for viewing, as shown in Figure 7.5
Conclusion
Hope the article would have helped you in understanding Creating an Image Object in GDI+. Read other articles on GDI+ on the website.