ListView Control with Multiple Column in VB.NET
There are many questions about adding multiple columns to a ListView control. Some times its hard for beginners to find even small clues like ListView multi column won't work until you set its View property as Details.
There are many questions about adding multiple columns to a ListView control. Some times its hard for beginners to find even small clues like ListView multi column won't work until you set its View property as Details.
Any way, this small article explains how to create a multi column list view control and add data to it.
Creating Project
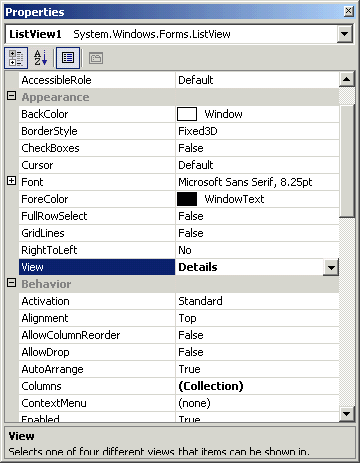
First create a Windows Application project in Visual Studio .NET and drop a ListView control from toolbox to the form. After that first thing you need to do is to set View property of list view control to Details. See figure 1.

Figure 1. Setting ListView Control's View Property to Details.
The View property can have any of following members of View enum.
| Member |
Description |
| Details |
Each item appears on a separate line with further information about each item arranged in columns. The left most column contains a small icon and label, and subsequent columns contain sub items as specified by the application. A column displays a header which can display a caption for the column. The user can resize each column at runtime. |
| LargeIcon |
Each item appears as a full-sized icon with a label below it. |
| List |
Each item appears as a small icon with a label to its right. Items are arranged in columns with no column headers. |
| SmallIcon |
Each item appears as a small icon with a label to its right. |
You can also set this property programmatically by using the following code:
ListView1.View = System.Windows.Forms.View.Details
Adding Multiple Columns
Now I add five columns to the control. You can add column headers to the control using its Columns.Add method. The Columns.Add method takes column header name, its width, and alignment.
In our sample, I write code at Form_Load method to do so. See Listing 1.
Private Sub Form1_Load(ByVal sender As System.Object, ByVal e As System.EventArgs) Handles MyBase.Load
' Adding ListView Columns
ListView1.Columns.Add("Emp Name", 100, HorizontalAlignment.Left)
ListView1.Columns.Add("Emp Address", 150, HorizontalAlignment.Left)ListView1.Columns.Add("Title", 60, HorizontalAlignment.Left)
ListView1.Columns.Add("Salary", 50, HorizontalAlignment.Left)ListView1.Columns.Add("Department", 60, HorizontalAlignment.Left)
End Sub
Listing 1. Adding Column Headers of a ListView Control
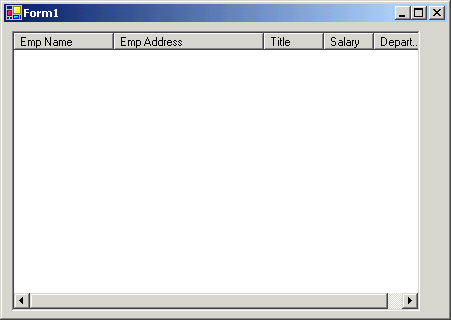
After adding this code, the output of program looks like Figure 2.

Figure 2. Multiple Column Headers
Adding Records
ListView.Item.Add method adds records to a list view control. The Add method takes ListViewItem type value. For multi column list view control, we create a ListViewItem with an array of 5 string items. The following code adds a record to the list view control.
Dim str(5) As String
Dim itm As ListViewItem
str(0) = "Rob Machy"
str(1) = "100 North Ave"
str(2) = "Business Manager"
str(3) = "89,000"
str(4) = "Development"
itm = New ListViewItem(str)
ListView1.Items.Add(itm)
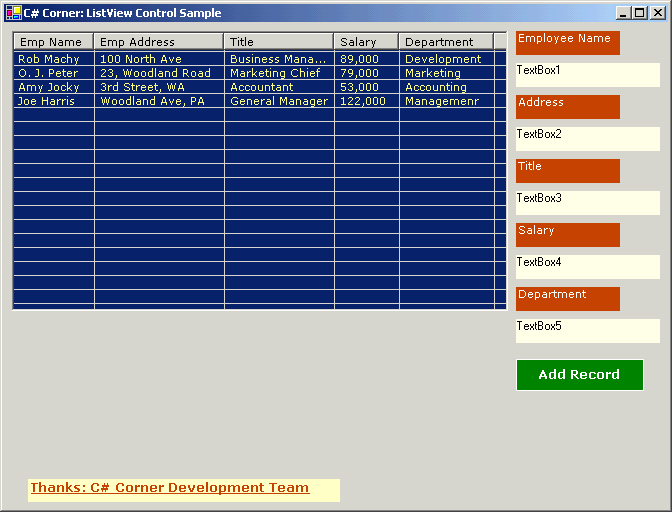
After setting more properties of the list view control and adding more records, our list program looks like Figure 3.

Figure 3. Multi Column ListView Control