In this article we will learn how to use RadioButtonList control in ASP.NET.
RadioButtonList control
RadioButtonList control is an important control are used to check the list. The RadioButtonList control provides a single-selection checked list. Like other list controls, RadioButtonList has an Items collection with members that correspond to each item in the list. To determine which items are selected, test the Selected property of each item.
Properties: These are the following properties of the timer control.
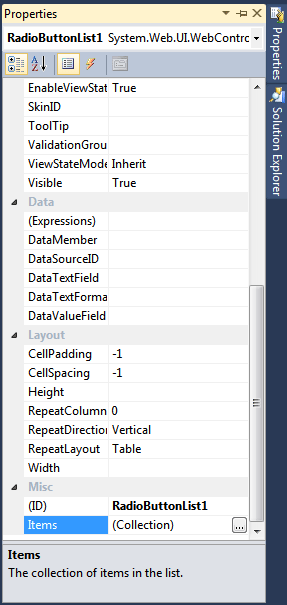
Figure 1.
Items - The collection of items in the list. click on the collection.
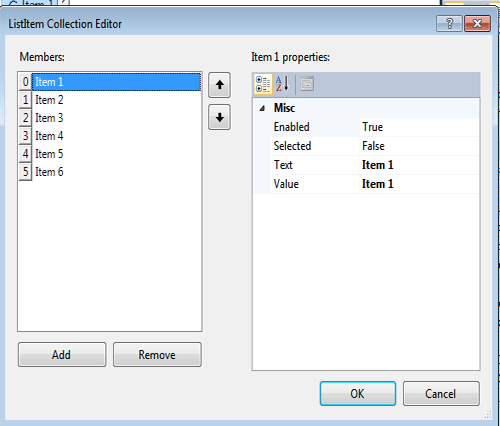
Figure 2.
For example
Drag RadioButtonList control, two CheckBox, and one Button and a Label control on the form.
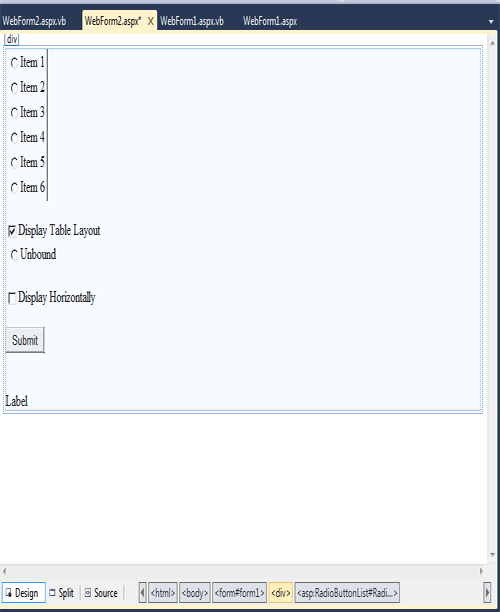
figure 3.
Now double click on the button control and each CheckBox on the form and add the following code to each click.
Protected Sub RadioButtonList1_SelectedIndexChanged(ByVal sender As Object, ByVal e As EventArgs) Handles RadioButtonList1.SelectedIndexChanged
End Sub
Protected Sub Button1_Click(ByVal sender As Object, ByVal e As EventArgs) Handles Button2.Click
If RadioButtonList1.SelectedIndex > -1 Then
Label1.Text = "You selected: " & RadioButtonList1.SelectedItem.Text
End If
End Sub
Protected Sub chkLayout_CheckedChanged(ByVal sender As Object, ByVal e As EventArgs) Handles chkLayout.CheckedChanged
If chkLayout.Checked = True Then
RadioButtonList1.RepeatLayout = RepeatLayout.Table
Else
RadioButtonList1.RepeatLayout = RepeatLayout.Flow
End If
End Sub
Protected Sub chkDirection_CheckedChanged(ByVal sender As Object, ByVal e As EventArgs) Handles chkDirection.CheckedChanged
If chkDirection.Checked = True Then
RadioButtonList1.RepeatDirection = RepeatDirection.Horizontal
Else
RadioButtonList1.RepeatDirection = RepeatDirection.Vertical
End If
To see the source code click on the source button from design form.
<%@ Page Language="vb" AutoEventWireup="false" CodeBehind="WebForm2.aspx.vb" Inherits="WebApplication30.WebForm2" %>
<!DOCTYPE html PUBLIC "-//W3C//DTD XHTML 1.0 Transitional//EN" "http://www.w3.org/TR/xhtml1/DTD/xhtml1-transitional.dtd">
<html xmlns="http://www.w3.org/1999/xhtml">
<head runat="server">
<title></title>
</head>
<body>
<form id="form1" runat="server">
<div>
<asp:RadioButtonList id=RadioButtonList1 runat="server">
<asp:ListItem>Item 1</asp:ListItem>
<asp:ListItem>Item 2</asp:ListItem>
<asp:ListItem>Item 3</asp:ListItem>
<asp:ListItem>Item 4</asp:ListItem>
<asp:ListItem>Item 5</asp:ListItem>
<asp:ListItem>Item 6</asp:ListItem>
</asp:RadioButtonList>
<p>
<asp:CheckBox id=chkLayout OnCheckedChanged="chkLayout_CheckedChanged" Text="Display Table Layout" Checked=true AutoPostBack="true" runat="server" />
<asp:RadioButtonList ID="RadioButtonList2" runat="server">
</asp:RadioButtonList>
<br>
<asp:CheckBox id=chkDirection OnCheckedChanged="chkDirection_CheckedChanged" Text="Display Horizontally" AutoPostBack="true" runat="server" />
<p>
<asp:Button id=Button2 Text="Submit" onclick="Button1_Click" runat="server"/>
<br />
<br />
<br />
<asp:Label ID="Label1" runat="server" Text="Label"></asp:Label>
</form>
</body>
</html>
Now save and run the application.
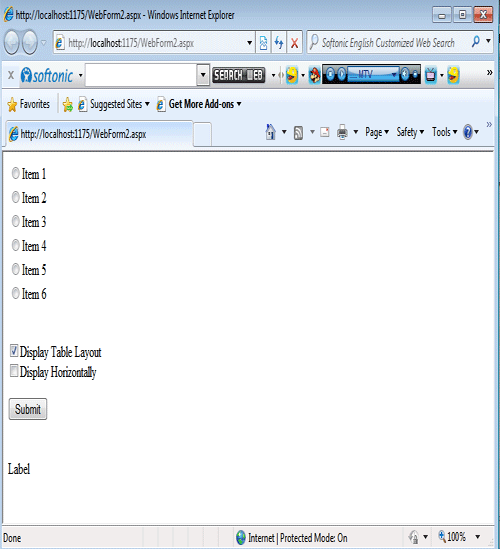
Figure 4.
Now we check item 3 and then click the submit button.
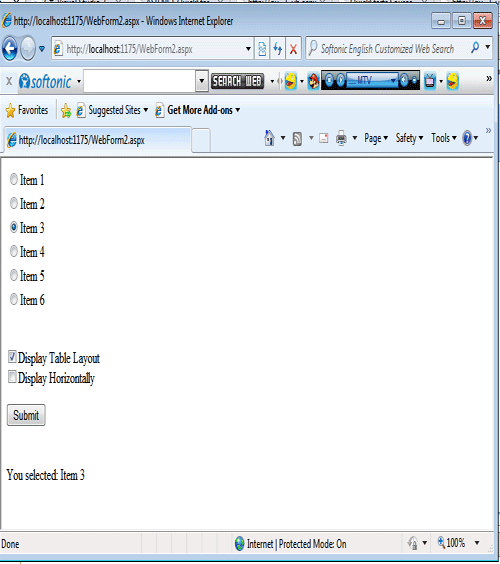
Figure 5.
Now tick on the checkbox display horizontally. It shows all items horizontally.
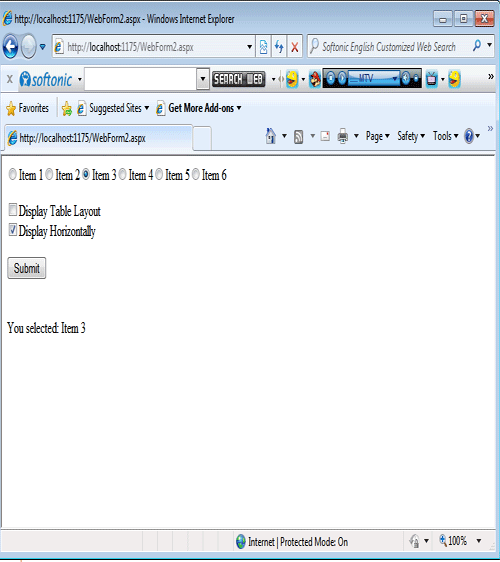
Figure 6.