Visual Studio .NET and XML Support in VB.NET
IN this article we are going to explain how to Visual Studio .NET and XML support in VB.NET.
XML schemas play major in the .NET Framework, and visual studio .NET provides many tools and utilities to work with XML. The .NET Framework uses XML to transfer data from one application to another. XML schemas define the structure and validation rules of XML document. You use XML schemas definition (XSD) language to define XML schemas
VS.NET provides an XML designer to work with schemas. In this section you'll see how you can take advantage of the VS.NETXML designer and wizard features to work with XML Documents and database.
Generating a New Schema
To generate a new schema, create a new Windows application using File > New > Project > Visual C# Projects > Window Application. Just follow the steps outlined in the following sections.
Adding an Empty Schema
First, right-click on the project select Add > Add New Item (see Figure 6-13).
Figure 6-13. Adding a new item to the project
Now, from Templates, select the XML schema option, type your schema name, and click open (see figure 6-14).
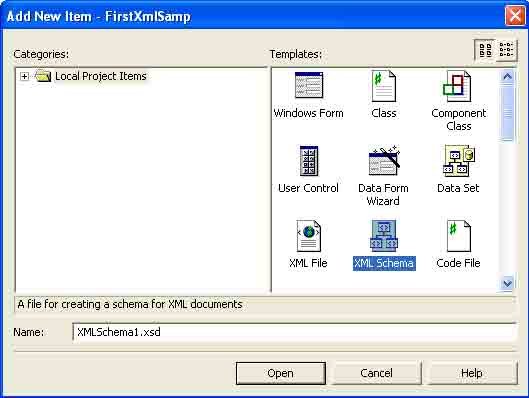
Figure 6-14. Selecting the XML schema template to add a schema to the project
This action launches XML Designer, now you'll see your XmlSchema1.xsd file, as shown in figure 6-15.
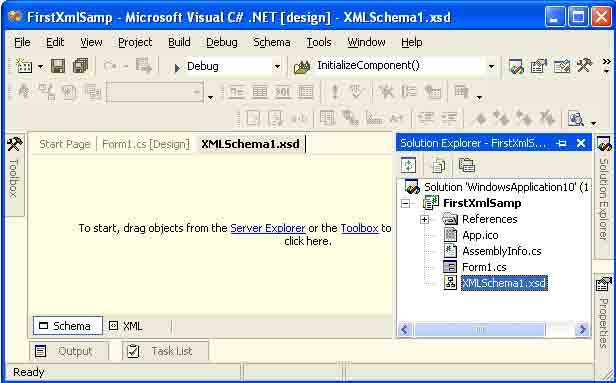
Figure 6-15. XML Designer
This action adds an empty XML schema to your project. If you click on the XML option at the button of screen, you'll see your XML looks like the following:
<?xml version="1.0" encoding="utf-8" ?>
<xs:schema id="XMLSchema1"
targetNamespace="http://tempuri.org/XMLSchema1.xsd"
elementFormDefault="qualified"
xmlns="http://tempuri.org/XMLSchema1.xsd"
xmlns:mstns="http://tempuri.org/XMLSchema1.xsd"
xmlns:xs="http://www.w3.org/2001/XMLSchema">
</xs:schema>
As you see in figure 6-15, there are two options (blue links): Server Explorer and Toolbox.
Adding Schema Items
You can add schema items using the Toolbox option. Clicking the Toolbox link launches the toolbox, as shown in figure 6-16.
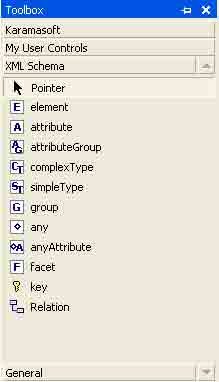
Figure 6-16. XML schema toolbox
As you can see in figure 6-16, you can add an element, attribute, complexType, and other schema items to the form by just dragging an item to XML Designer.
OK, now you'll learn how to add XML schema items to the schema and set their properties with the help of XML Designer. First, add an element. To add an element to the schema, drag an element from the toolbox. Now you can set its name and type in the designer. The default element looks like figure 6-17, if you click on the Right-side column of the grid, you'll see a drop-down list with element types. You can either select the type of an item from the list or define your own type. Your type is called a user-defined type.
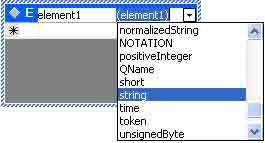
Figure 6-17. Adding a schema element and its type
Define your first element as bookstore with a custom type of bookstoretype. Figure 6-18 shows the bookstore element of bookstoretype.

Figure 6-18. Adding a new bookstore element
Now add a complexType by dragging a comlpexType to XML Designer (see figure 6-19).

Figure 6-19. A complex Type item
A complex Type item can contain other types, too. You can add items to a complexType in many ways. You can either drag an item from the toolbox to the complexType or right-click on a complexType and use the Add option and its sub options to add an item. Figure 6-20 shows different items you can add to a complex type.
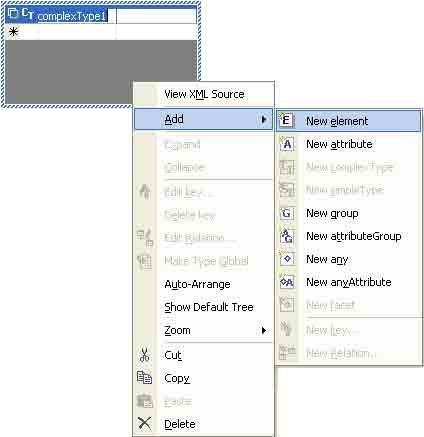
Figure 6-20. An item list can be added to a complex Type
You can delete items by right clicking and selecting Delete. You can also delete the entire complexType or other schema items by right clicking on the header of an item or on the left side of the item.
Now rename the added complexType name to book and add four element types: title, author, price, and category. Now your complexType book looks like Figure 6-21.
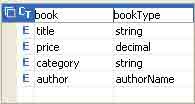
Figure 6-21. The book complex Type and its elements
After that, adds one more complexType author with two elements: first-name and last-name. Your final schema look like figure 6-22.
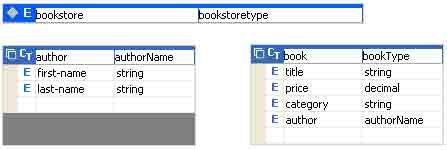
Figure 6-22. The author and book complexType in an XML schema
Now you can see XML code for this schema by clicking on the left-bottom XML button shown in figure 6-23.
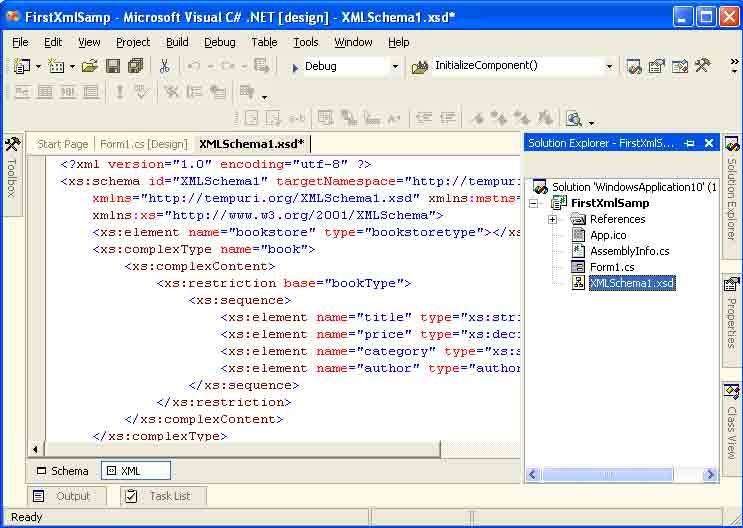
Figure 6-23. Viewing the XML for a schema
Listing 6-34 shows the schema XML code.
Listing 6-34. Xml generated using XML Designer
<?xml version="1.0" encoding="utf-8" ?>
<xs:schema id="XMLSchema1" targetNamespace="http://tempuri.org/XMLSchema1.xsd" elementFormDefault="qualified"
xmlns="http://tempuri.org/XMLSchema1.xsd" xmlns:mstns="http://tempuri.org/XMLSchema1.xsd"
xmlns:xs="http://www.w3.org/2001/XMLSchema">
<xs:element name="bookstore" type="bookstoretype"></xs:element>
<xs:complexType name="book">
<xs:complexContent>
<xs:restriction base="bookType">
<xs:sequence>
<xs:element name="title" type="xs:string"></xs:element>
<xs:element name="price" type="xs:decimal"></xs:element>
<xs:element name="category" type="xs:string"></xs:element>
<xs:element name="author" type="authorName"></xs:element>
</xs:sequence>
</xs:restriction>
</xs:complexContent>
</xs:complexType>
<xs:complexType name="author">
<xs:complexContent>
<xs:restriction base="authorName">
<xs:sequence>
<xs:element name="first-name" type="xs:string" />
<xs:element name="last-name" type="xs:string" />
</xs:sequence>
</xs:restriction>
</xs:complexContent>
</xs:complexType>
</xs:schema>
Conclusion
Hope this article would have helped you in understanding Visual Studio .NET and XML support. See other articles on the website also for further reference.