In this article, I will show how to create a simple user control and then how to use it in a Windows WPF application.
1. Create a User Control
I created a new WPF based Windows application. My WPF application name is WpfApplication3. You may want to give your application name like "MyWPFControlsLibrary" or something like that.
Add a new item by selecting VB in the left pane and User Control (WPF) in the right pane. See Figure 1. This action will add a UserControl1.vb file and a code behind file to your project. You may change the name of this file to whatever you want.
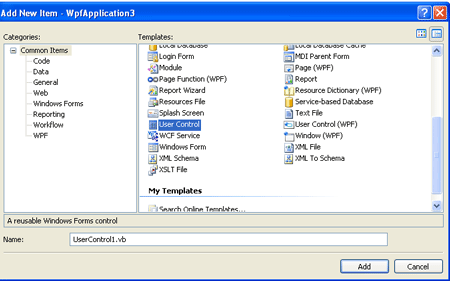
Figure 1.
In my application, I added four User Controls (Header, Footer, Left bar, Right bar). Put whatever code u want in your user controls.
The following code shows the header user control XAML contents.
Header.xaml
<UserControl x:Class="WpfApplication3.Header"
xmlns="http://schemas.microsoft.com/winfx/2006/xaml/presentation"
xmlns:x="http://schemas.microsoft.com/winfx/2006/xaml"
Height="100" Width="600">
<Grid Background="DarkSalmon">
<Grid.RowDefinitions>
<RowDefinition Height="100"></RowDefinition>
</Grid.RowDefinitions>
<Grid.ColumnDefinitions>
<ColumnDefinition Width="600"></ColumnDefinition>
</Grid.ColumnDefinitions>
<TextBlock Grid.Row="0" HorizontalAlignment="Center" Grid.Column="0">This is header</TextBlock>
</Grid>
</UserControl>
Now compile and build your application.
Your user controls are ready to use.
2. Use a User Control
In previous part of this article, I discussed how to create a user control in WPF. In this part, let's see how use a user control, which we just created.
To test this, we can use same Windows WPF application or you can create a new application. If you create a new application, you need to add a reference to the above assembly (DLL) to your application.
Once an assembly reference is added, we need to add namespace support to the XAML code using following code.
xmlns:local="clr-namespace:WpfApplication3"
Once the namespace reference is added, you should be able to access the Header user control we created in the previous section.
Here is my final window1.xaml code looks like. As you can see from this code below, I am accessing the header control in the commented section. Similarily, I add all four controls I created in the above section.
<Window x:Class="WpfApplication3.Window1"
xmlns="http://schemas.microsoft.com/winfx/2006/xaml/presentation"
xmlns:x="http://schemas.microsoft.com/winfx/2006/xaml"
Title="Window1" Height="600" Width="600"
xmlns:local="clr-namespace:WpfApplication3">
<Grid>
<Grid.RowDefinitions>
<RowDefinition Height="100"></RowDefinition>
<RowDefinition Height="400"></RowDefinition>
<RowDefinition Height="100"></RowDefinition>
</Grid.RowDefinitions>
<Grid.ColumnDefinitions>
<ColumnDefinition Width="150"></ColumnDefinition>
<ColumnDefinition Width="300"></ColumnDefinition>
<ColumnDefinition Width="150"></ColumnDefinition>
</Grid.ColumnDefinitions>
<!-- User Controls -->
<local:Header HorizontalAlignment="Left" Grid.Row="0" Margin="2,2,2,2" Grid.Column="0" Grid.ColumnSpan="3"></local:Header>
<local:Footer HorizontalAlignment="Left" Grid.Row="2" Margin="2,2,2,2" Grid.Column="0" Grid.ColumnSpan="3"></local:Footer>
<local:Leftbar HorizontalAlignment="Left" Grid.Row="1" Grid.Column="0" Margin="2,2,2,2"></local:Leftbar>
<local:Rightbar HorizontalAlignment="Left" Grid.Row="1" Grid.Column="2" Margin="2,2,2,2"></local:Rightbar>
<!-- -->
<Image Source="Raj 061.JPG" Height="300" Width="300" Grid.Row="1" Grid.Column="1"></Image>
</Grid>
</Window>
Now build and run the application.
The result looks like this. As you can see from Figure 2, all of my four controls are available on this window. As I mentioned earlier, you controls can have any functionality on them.
Figure 2.
3. Adding a User Control to Toolbox
Here comes the good part. You can add your user control to Visual Studio Toolbox manually so the User Control is available all the time.
The following steps show how to do this.
1. Right click on Toolbox window.
2. Click Choose Items... menu on context menu.
3. Select WPF components tab on Choose Toolbox Items dialog window.
4. Click Browse... button, select your project assembly.
5. Select and add your user control to toolbox.
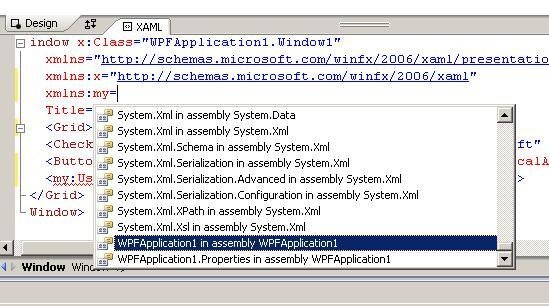
Figure 3.
I hope you found this article useful. All comments and concerns are most welcome below.