GridViewComplexHead in ASP.NET using VB.NET
In this article you will learn that how you can add GridViewComplexHead.
Introduction
In this article I am explaining that how you can add GridViewComplexHead in ASP.NET using VB.NET. The implementation of this needs to import the System.Collections namespace. You can add table head to GridView. Here we are using Literal control to add table head.
Imports System.Collections
The ICollection interface is the best interface for classes in the System.Collections namespace. Dictionary and IList are more specialized interfaces that are based on the ICollection interface. An IDictionary implementation is a collection of key and value pairs, like the Hashtable class. An IList implementation is a collection of values that can be sorted and whose members can be accessed by index like the Array List class. we use DataTable to add column and use the DataRow to add row. We use the Literal control to reserve a location on the web page to display text. The Literal control is similar to the Label control, except the Literal control does not allow you to apply a style to the displayed text. You can programmatically control the Text displayed in the control by setting the Text property.
You use the Literal control to add ComplexHead, Page_Load Event to display data, GridView1_RowCreated Event to create ComplexHead and GridView1_RowDataBound to set color.
Getting Started
-
Simply create a new ASP.NET web application.
-
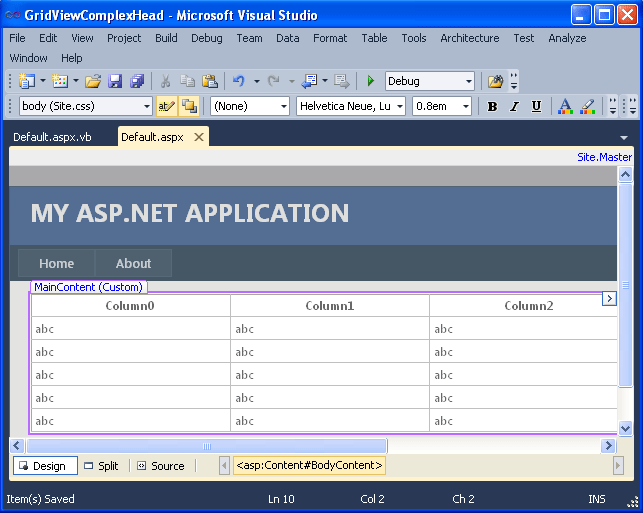
Drag the GridView control on web page the Page will look like below.
-
You can also add the control manually by the below code.
<%@ Page Title="Home Page" Language="vb" MasterPageFile="~/Site.Master" AutoEventWireup="false"
CodeBehind="Default.aspx.vb" Inherits="GridViewComplexHead._Default" %>
<asp:Content ID="HeaderContent" runat="server" ContentPlaceHolderID="HeadContent">
</asp:Content>
<asp:Content ID="BodyContent" runat="server" ContentPlaceHolderID="MainContent">
<asp:GridView ID="GridView1" runat="server" CellSpacing="1" CellPadding="3" Font-Size="12px" Width="600px" BackColor="Transparent"
BorderWidth="0px" OnRowDataBound="GridView1_RowDataBound" OnRowCreated="GridView1_RowCreated">
</asp:GridView>
</asp:Content>
-
Then add the below code in code Behind File of the Web page.
Protected Function CreateDataSource() As ICollection
Dim dt As New System.Data.DataTable()
Dim dr As System.Data.DataRow
Dim i As Integer
dt.Columns.Add(New System.Data.DataColumn("Class", System.Type.GetType("System.String")))
dt.Columns.Add(New System.Data.DataColumn("Name", System.Type.GetType("System.String")))
dt.Columns.Add(New System.Data.DataColumn("Literature", System.Type.GetType("System.Decimal")))
dt.Columns.Add(New System.Data.DataColumn("Math", System.Type.GetType("System.Decimal")))
dt.Columns.Add(New System.Data.DataColumn("English", System.Type.GetType("System.Decimal")))
dt.Columns.Add(New System.Data.DataColumn("Computer", System.Type.GetType("System.Decimal")))
For i = 0 To 7
Dim rd As New System.Random(Environment.TickCount * i)
dr = dt.NewRow()
dr(0) = "Class" + i.ToString()
dr(1) = "Student" + i.ToString()
dr(2) = System.Math.Round(rd.NextDouble() * 100, 2)
dr(3) = System.Math.Round(rd.NextDouble() * 100, 2)
dr(4) = System.Math.Round(rd.NextDouble() * 100, 2)
dr(5) = System.Math.Round(rd.NextDouble() * 100, 2)
dt.Rows.Add(dr)
Next
Dim dv As New System.Data.DataView(dt)
Return dv
End Function
Protected Sub Page_Load(ByVal sender As Object, ByVal e As System.EventArgs) Handles Me.Load
If IsPostBack = False Then
GridView1.BorderColor = System.Drawing.Color.DarkOrange
GridView1.DataSource = CreateDataSource()
GridView1.DataBind()
End If
End Sub
Protected Sub GridView1_RowCreated(ByVal sender As Object, ByVal e As System.Web.UI.WebControls.GridViewRowEventArgs)
If e.Row.RowType = DataControlRowType.Header Then
Dim rowHeader As New GridViewRow(0, 0, DataControlRowType.Header, DataControlRowState.Normal)
Dim HeaderBackColor As String = "#EDEDED"
rowHeader.BackColor = System.Drawing.ColorTranslator.FromHtml(HeaderBackColor)
Dim newCells As New Literal()
newCells.Text = "Table Head letter1</th><th colspan='2'>Table Head letter2</th><th colspan='2'>Table Head
letter3</th><th>Table Head letter4</th></tr><tr bgcolor='" + HeaderBackColor + "'>"
newCells.Text += "<th colspan='2'>Table Head letter5</th><th rowspan='2'>Table Head letter6</th><th colspan='2'>Table Head
letter7</th></tr><tr bgcolor='" + HeaderBackColor + "'>"
newCells.Text += " <th>Table Head letter8</th><th>Table Head letter9</th><th>Table Head letter10</th><th>Table Head
letter11</th><th>Table Head letter12"
Dim cells As TableCellCollection = e.Row.Cells
Dim headerCell As New TableHeaderCell()
headerCell.RowSpan = 2
headerCell.Controls.Add(newCells)
rowHeader.Cells.Add(headerCell)
rowHeader.Cells.Add(headerCell)
rowHeader.Visible = True
GridView1.Controls(0).Controls.AddAt(0, rowHeader)
End If
End Sub
Protected Sub GridView1_RowDataBound(ByVal sender As Object, ByVal e As System.Web.UI.WebControls.GridViewRowEventArgs)
If e.Row.RowType = DataControlRowType.Header Then
e.Row.Attributes.Add("style", "background:#9999FF;color:#FFFFFF;font-size:14px")
Else
e.Row.Attributes.Add("style", "background:#FFF")
End If
End Sub
-
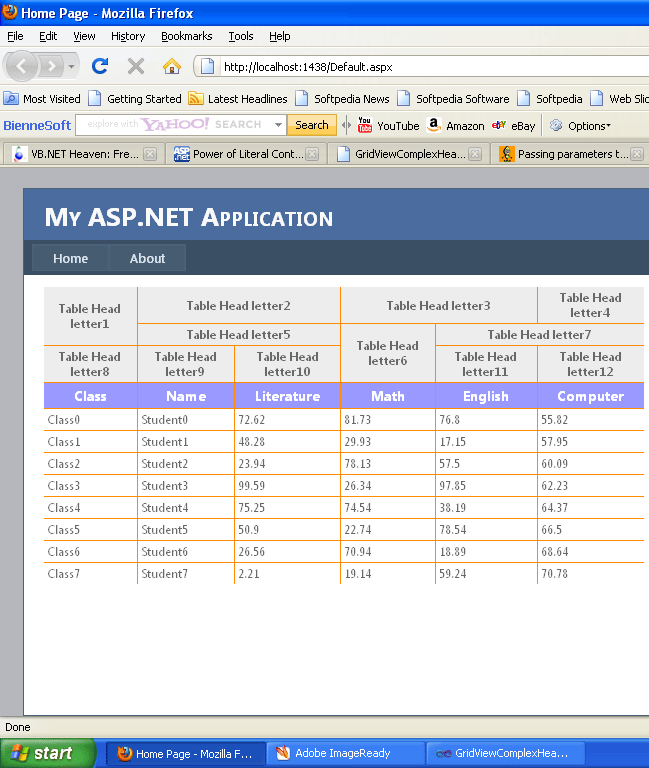
Now run your application.
Output:-
Summary
In this article you learned that how can you add the GridViewComplexHead in ASP.NET.