How to create a custom control in ASP.NET
In this article we will learn how to create a custom control in ASP.NET.
In this article we will learn how to create a user control in ASP. NET.
User control
Custom control is a control which is created by user for their own purpose it can be merge with the ASP. NET control. ASP. NET pages that have the file extension .aspx but user control have the extension .ascx. User controls files cannot be requested via a browser. they can only be used via the containing ASP. NET page.
Adding a user control to the web site
Now right click your solution and click Add New Item, then from the dialog window click Web User Control and name the control Mytable.ascx.
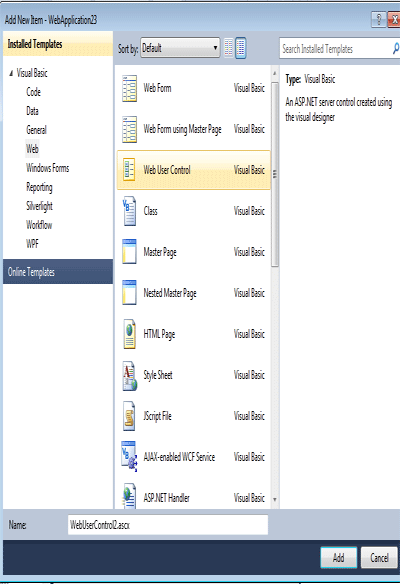
Figure 1.
Setting up the Register directive
<%@ Register TagName="MyTable" TagPrefix="roh" Src="~/MyTable.ascx" %>
In above example, in <%@ Register %> directive we have used following three attributes:
TagPrefix: Indicates the namespace that we want to associate with the User Control for the current page. We can use any string that we want.
TagName: Indicates the name that we want to associate with the User Control for the current page. We can use any string that we want.
Src: Indicates the virtual path to the User control (the path for the .ascx file).
Now Create a control as <roh:MyTable/> and Define the ID and RunAt properties.
<roh:MyTable Color="green" Number="6" FontSize="14" ID="t1" runat="server" />
The above line of code defines the some properties like color, number, fontsize.
Default.aspx File Code
<@PageLanguage="vb"AutoEventWireup="false"CodeBehind="WebForm2.aspx.vb"Inherits="WebApplication23.WebForm2">
<%@ Register TagName="MyTable" TagPrefix="roh" Src="~/MyTable.ascx" %>
<!DOCTYPE html PUBLIC "-//W3C//DTD XHTML 1.0 Transitional//EN" "http://www.w3.org/TR/xhtml1/DTD/xhtml1-transitional.dtd">
<html xmlns="http://www.w3.org/1999/xhtml">
<head runat="server">
<title></title>
</head>
<body>
<form id="form1" runat="server">
<div>
<roh:MyTable Color="green" Number="6" FontSize="14" ID="t1" runat="server" />
</div>
</form>
</body>
</html>
Now click on the design button. Form looks like this.
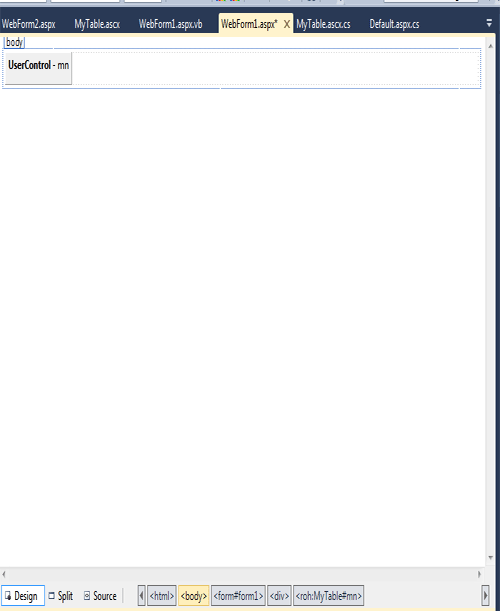
Figure 2.
Now right click on the control to see the property.
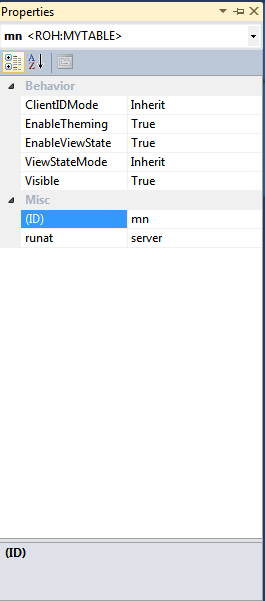
Figure 3.