A ListBox control provides an interface to display a list of items. Users can select one or multiple items form the list. A ListBox may be used to display multiple columns and these columns may have images and other controls.
In this tutorial, we will learn how to create a ListBox control at design-time as well as at run-time. We will also see how to create multiple columns ListBox control with single and multiple selections. This article also covers most of the properties and methods of the ListBox control.
Creating a ListBox
There are two approaches to create a ListBox control in Windows Forms. Either we can use the Forms designer to create a control at design-time or we can use the ListBox class to create a control at run-time.
Design-time
In our first approach, we are going to create a ListBox control at design-time using the Forms designer.
To create a ListBox control at design-time, we simply drag and drop a ListBox control from Toolbox to a Form in Visual Studio. After you drag and drop a ListBox on a Form, the ListBox looks like Figure 1. Once a ListBox is on the Form, you can move it around and resize it using mouse and set its properties and events.

Figure 1
Run-time
The ListBox class represents a ListBox control in Windows Forms. To create a ListBox control at run-time, we create an instance of the ListBox class, set its properties and add ListBox object to the Form controls.
First step to create a dynamic ListBox is to create an instance of ListBox class. The following code snippet creates a ListBox control object.
Dim ListBox1 As New ListBox
In the next step, you may set properties of a ListBox control. The following code snippet sets location, width, height, background color, foreground color, Text, Name, and Font properties of a ListBox.
ListBox1.Location = New System.Drawing.Point(12, 12)
ListBox1.Name = "ListBox1"
ListBox1.Size = New System.Drawing.Size(245, 200)
ListBox1.BackColor = System.Drawing.Color.Orange
ListBox1.ForeColor = System.Drawing.Color.Black
Once the ListBox control is ready with its properties, the next step is to add the ListBox to a Form. To do so, we use Form.Controls.Add method that adds ListBox control to the Form controls and displays on the Form based on the location and size of the control. The following code snippet adds a ListBox control to the current Form.
Controls.Add(ListBox1)
Setting ListBox Properties
The easiest way to set properties is from the Properties Window. You can open Properties window by pressing F4 or right click on a control and select Properties menu item. The Properties window looks like Figure 2.
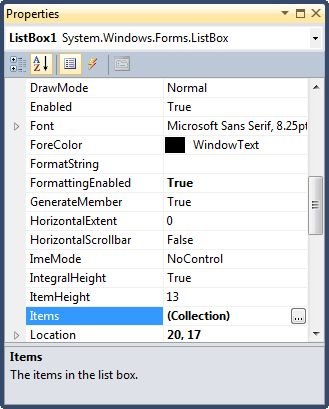
Figure 2
Name
Name property represents a unique name of a ListBox control. It is used to access the control in the code. The following code snippet sets and gets the name and text of a ListBox control.
ListBox1.Name = "ListBox1"
Location, Height, Width and Size
The Location property takes a Point that specifies the starting position of the ListBox on a Form. You may also use Left and Top properties to specify the location of a control from the left top corner of the Form. The Size property specifies the size of the control. We can also use Width and Height property instead of Size property. The following code snippet sets Location, Width, and Height properties of a ListBox control.
ListBox1.Location = New System.Drawing.Point(12, 12)
ListBox1.Size = New System.Drawing.Size(300, 250)
ListBox1.Width = 300
ListBox1.Height = 250
Font
Font property represents the font of text of a ListBox control. If you click on the Font property in Properties window, you will see Font name, size and other font options. The following code snippet sets Font property at run-time.
ListBox1.Font = new Font("Georgia", 16)
Background and Foreground
BackColor and ForeColor properties are used to set background and foreground color of a ListBox respectively. If you click on these properties in Properties window, the Color Dialog pops up.
Alternatively, you can set background and foreground colors at run-time. The following code snippet sets BackColor and ForeColor properties.
ListBox1.BackColor = System.Drawing.Color.Orange
ListBox1.ForeColor = System.Drawing.Color.Black
The new ListBox with background and foreground looks like Figure 3.
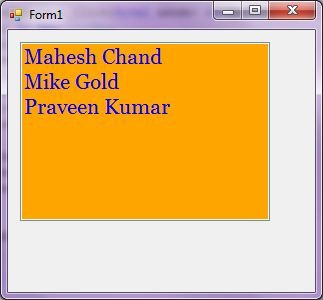
Figure 3
You can also set borders style of a ListBox by using the BorderStyle property. The BorderStyle property is represented by a BorderStyle enumeration that has three values â€" FixedSingle, Fixed3D, and None. The default value of border style is Fixed3D. The following code snippet sets the border style of a ListBox to FixedSingle.
ListBox1.BorderStyle = BorderStyle.FixedSingle
ListBox Items
The Items property is used to add and work with items in a ListBox. We can add items to a ListBox at design-time from Properties Window by clicking on Items Collection as you can see in Figure 4.
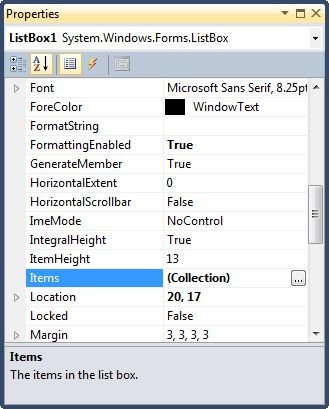
Figure 4
When you click on the Collections, the String Collection Editor window will pop up where you can type strings. Each line added to this collection will become a ListBox item. I add four items as you can see from Figure 5.
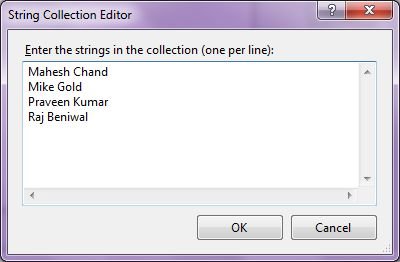
Figure 5
The ListBox looks like Figure 6.
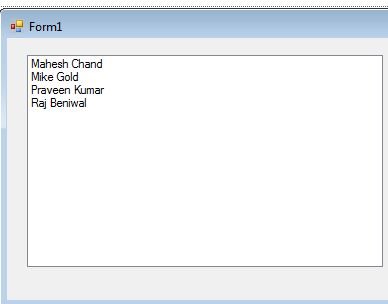
Figure 6
You can add same items at run-time by using the following code snippet.
ListBox1.Items.Add("Mahesh Chand")
ListBox1.Items.Add("Mike Gold")
ListBox1.Items.Add("Praveen Kumar")
ListBox1.Items.Add("Raj Beniwal")
Getting All Items
To get all items, we use the Items property and loop through it to read all the items. The following code snippet loops through all items and adds item contents to a StringBuilder and displays in a MessageBox.
Dim sb As New System.Text.StringBuilder
For Each item In ListBox1.Items
sb.Append(item)
sb.Append(" ")
Next
MessageBox.Show(sb.ToString())
Selected Text and Item
Text property is used to set and get text of a ListBox. The following code snippet sets and gets current text of a ListBox.
ListBox1.Text = "Mahesh Chand"
MessageBox.Show(ListBox1.Text)
We can also get text associated with currently selected item by using Items property.
Dim selectedItem As String = ListBox1.Items(ListBox1.SelectedIndex)
Why the value of ListBox.SelectedText is Empty?
SelectedText property gets and sets the selected text in a ListBox only when a ListBox has focus on it. If the focus moves away from a ListBox, the value of SelectedText will be an empty string. To get current text in a ListBox when it does not have focus, use Text property.
Selection Mode and Selecting Items
SelectionMode property defines how items are selected in a ListBox. The SelectionMode value can be one of the following four SelectionMode enumeration values.
- None - No item can be selected.
- One - Only one item can be selected.
- MultiSimple - Multiple items can be selected.
- MultiExtended - Multiple items can be selected, and the user can use the SHIFT, CTRL, and arrow keys to make selections.
To select an item in a ListBox, we can use the SetSelect method that takes item index and a true or false value where true value represent the item to be selected.
The following code snippet make a ListBox multiple selection and selects second and third item in the list.
ListBox1.SelectionMode = SelectionMode.MultiSimple
ListBox1.SetSelected(1, True)
ListBox1.SetSelected(2, True)
How to disable item selection in a ListBox?
Just set SelectionMode property to None.
Sorting Items
The Sorted property set to true, the ListBox items are sorted. The following code snippet sorts the ListBox items.
ListBox1.Sorted = True
Find Items
The FindString method is used to find a string or substring in a ListBox. The following code snippet finds a string in a ListBox and selects it if found.
Private Sub FindStringButton_Click(ByVal sender As System.Object, _
ByVal e As System.EventArgs) Handles FindStringButton.Click
Dim index As Integer = ListBox1.FindString(TextBox1.Text)
If (index < 0) Then
MessageBox.Show("Item not found.")
TextBox1.Text = String.Empty
Else
ListBox1.SelectedIndex = index
End If
End Sub
ListBox SelectedIndexChanged Event Hander
SelectedIndexChanged event is fired when the item selection is changed in a ListBox. You can add the event handler using the Properties Widow and selecting on Event icon and double click on SelectedIndexChanged as you can see in Figure 7.
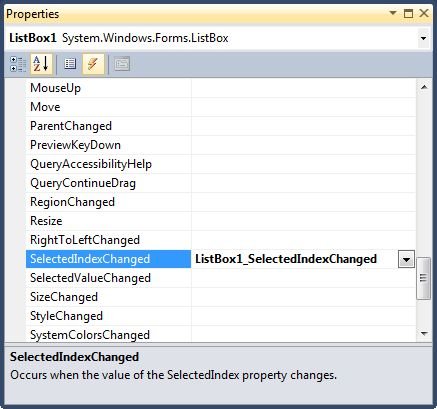
Figure 7
The following code snippet defines and implements these events and their respective event handlers. You can use this same code to implement event at run-time.
AddHandler ListBox1.SelectedIndexChanged, AddressOf ListBox1SelectedIndexChanged
Private Sub ListBox1SelectedIndexChanged(ByVal sender As System.Object, _
ByVal e As System.EventArgs) Handles ListBox3.SelectedIndexChanged
MessageBox.Show(ListBox1.Text)
End Sub
Now every time you change the selection in the ListBox, you will see the selected item displayed in a MessageBox.
Data Binding
DataSource property is used to bind a collection of items to a ListBox. The following code snippet is a simple data binding example where an ArrayList is bound to a ListBox.
Private Sub DataBindingButton_Click(ByVal sender As System.Object, _
ByVal e As System.EventArgs) Handles DataBindingButton.Click
Dim authors As New ArrayList
authors.Add("Mahesh Chand")
authors.Add("Mike Gold")
authors.Add("Raj Kumar")
authors.Add("Praveen Kumar")
ListBox1.Items.Clear()
ListBox1.DataSource = authors
End Sub
If you are binding an object with multiple properites, you must specify which property you are displaying by using the DisplayMember property.
ListBox1.DataSource = GetData()
ListBox1.DisplayMember = "Name"
Summary
In this article, we discussed discuss how to create a ListBox control in Windows Forms at design-time as well as run-time. After that, we saw how to use various properties and methods.