TrackBar control provides scrolling with a little different interface than a scrollbar.
In this article, I will discuss how to create and use a TrackBar control in a Windows Forms application using Visual Studio 2010. After that, I will discuss various properties and methods available for the TrackBar control.
Creating a TrackBar
We can create a TrackBar control using a Forms designer at design-time or using the TrackBar class in code at run-time.
To create a TrackBar control at design-time, you simply drag and drop a TrackBar control from Toolbox to a Form in Visual Studio. After you drag and drop a TrackBar on a Form, the TrackBar looks like Figure 1. Once a TrackBar is on the Form, you can move it around and resize it using mouse and set its properties and events.
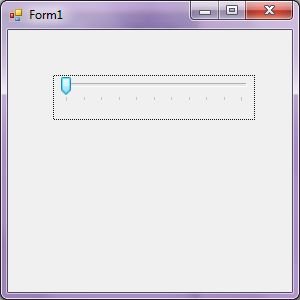
Figure 1
Creating a TrackBar control at run-time is merely a work of creating an instance of TrackBar class, set its properties and add TrackBar class to the Form controls.
First step to create a dynamic TrackBar is to create an instance of TrackBar class. The following code snippet creates a TrackBar control object.
Dim tbar As New TrackBar
In the next step, you may set properties of a TrackBar control. The following code snippet sets the height and width properties of a TrackBar.
tbar.Height = 40
tbar.Width = 300
Once a TrackBar control is ready with its properties, next step is to add the TrackBar control to the Form. To do so, we use Form.Controls.Add method. The following code snippet adds a TrackBar control to the current Form.
Controls.Add(tbar)
Setting TrackBar Properties
After you place a TrackBar control on a Form, the next step is to set properties.
The easiest way to set properties is from the Properties Window. You can open Properties window by pressing F4 or right click on a control and select Properties menu item. The Properties window looks like Figure 2.
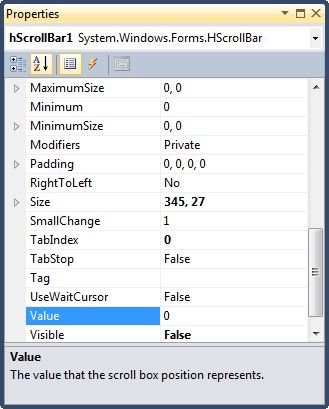
Figure 2
Location, Height, Width, and Size
The Location property takes a Point that specifies the starting position of the TrackBar on a Form. The Size property specifies the size of the control. We can also use Width and Height property instead of Size property. The Dock property is used to dock a control. The following code snippet sets Dock, Width, and Height properties of a TrackBar control.
tbar.Dock = DockStyle.Bottom
tbar.Width = 250
tbar.Height = 200
Note: The Width or Height property may not be applicable depending upon the Orientation property of the TrackBar control. If orientation is set to horizontal (default), the Height property has no effect. If orientation is set to vertical, the Width property has no effect.
Name
Name property represents a unique name of a TrackBar control. It is used to access the control in the code. The following code snippet sets and gets the name and text of a TrackBar control.
tbar.Name = "TrackBar1"
Maximum, Minimum, and Value
Value property of a TrackBar represents the current value of a TrackBar control. The Minimum and Maximum properties are used to set minimum and maximum limit of a TrackBar. The following code snippet sets the Minimum, Maximum, and Value properties of a TrackBar control.
tbar.Minimum = 0
tbar.Maximum = 100
tbar.Value = 40
LargeChange and SmallChange
We can use keyboard arrow keys, page up and page down keys to change the current value of a TrackBar control. The value changed with the keyboard arrows is small changes and the value changed with page up and page down keys is large changes.
SmallChange and LargeChange properties are used to set small and large change values. The following code snippet sets the SmallChange and LargeChange values to 2 and 10 respectively. The default values of the SmallChange and LargeChange properties are 1 and 5 respectively.
tbar.SmallChange = 2
tbar.LargeChange = 10
Orientation
Orientation property sets the horizontal or vertical orientation of a TrackBar control.
tbar.Orientation = Orientation.Vertical
TickFrequency and TickStyle
TickFrequency represents the number of ticks in a TrackBar between minimum and maximum values. For example, if minimum and maximum values of a TrackBar are 0 and 100. By setting TickFrequency to 20 means, it will take 20 steps from 0 to 100.
TickStyle property indicates how to display the tick marks on a TrackBar. It can be None, TopLeft, BottomRight, or Both.
tbar.TickFrequency = 50
tbar.TickStyle = TickStyle.BottomRight
Attaching TrackBar to a Control
Horizontal scroll bar control is attached to a control by its scroll event. On the scroll event hander, we usually read the current value of a TrackBar and based on this value, we apply on other controls.
The simplest way to add an event handler to a TrackBar is by double click on it or go to Events window. The following code snippet is added for an event handler for the Scroll event.
Friend WithEvents TrackBar1 As System.Windows.Forms.TrackBar
The following code is the handler.
Private Sub TrackBar1_Scroll(ByVal sender As System.Object, _
ByVal e As System.EventArgs) Handles TrackBar1.Scroll
MessageBox.Show(TrackBar1.Value.ToString())
End Sub
Summary
A TrackBar control is used to add horizontal scrolling feature to a Windows Forms control that do not have built-in scrolling feature. In this article, we discussed discuss how to create a TrackBar control in Windows Forms at design-time as well as run-time. After that, we saw how to use various properties and methods.