A ListView control provides an interface to display a list of items using different views including text, small images, and large images.
In this tutorial, we will learn how to create a ListView control. We will also see how to create multiple views of ListView items. This article also covers most of the properties and methods of the ListView control.
Creating a ListView
There are two approaches to create a ListView control in Windows Forms. Either we can use the Forms designer to create a control at design-time or we can use the ListView class to create a control at run-time.
Design-time
In our first approach, we are going to create a ListView control at design-time using the Forms designer.
To create a ListView control at design-time, we simply drag and drop a ListView control from Toolbox onto a Form in Visual Studio. After you drag and drop a ListView onto a Form, the ListView looks like Figure 1. Once a ListView is on the Form, you can move it around and resize it using mouse and set its properties and events.

Figure 1
Run-time
The ListView class represents a ListView control in Windows Forms. To create a ListView control at run-time, we create an instance of the ListView class, set its properties and add ListView object to the Form controls.
First step to create a dynamic ListView is to create an instance of ListView class. The following code snippet creates a ListView control object.
Dim ListView1 As New ListView
In the next step, you may set properties of a ListView control. The following code snippet sets location, width, height, background color, foreground color, Text, Name, and Font properties of a ListView.
ListView1.Location = New System.Drawing.Point(12, 12)
ListView1.Name = "ListView1"
ListView1.Size = New System.Drawing.Size(245, 200)
ListView1.BackColor = System.Drawing.Color.Orange
ListView1.ForeColor = System.Drawing.Color.Black
Once the ListView control is ready with its properties, the next step is to add the ListView to a Form. To do so, we use Form.Controls.Add method that adds ListView control to the Form controls and displays on the Form based on the location and size of the control. The following code snippet adds a ListView control to the current Form.
Controls.Add(ListView1)
Setting ListView Properties
The easiest way to set properties is from the Properties Window. You can open Properties window by pressing F4 or right click on a control and select Properties menu item. The Properties window looks like Figure 2.
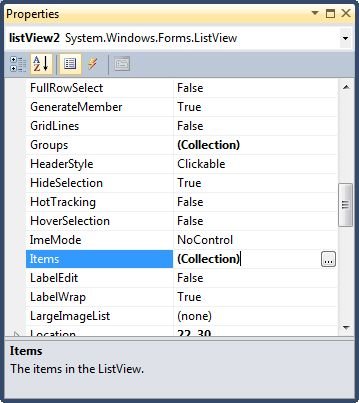
Figure 2
Name
Name property represents a unique name of a ListView control. It is used to access the control in the code. The following code snippet sets and gets the name and text of a ListView control.
ListView1.Name = "ListView1"
Location, Height, Width and Size
The Location property takes a Point that specifies the starting position of the ListView on a Form. You may also use Left and Top properties to specify the location of a control from the left top corner of the Form. The Size property specifies the size of the control. We can also use Width and Height property instead of Size property. The following code snippet sets Location, Width, and Height properties of a ListView control.
ListView1.Location = New System.Drawing.Point(12, 12)
ListView1.Size = New System.Drawing.Size(245, 200)
Font
Font property represents the font of text of a ListView control. If you click on the Font property in Properties window, you will see Font name, size and other font options. The following code snippet sets Font property at run-time.
ListView1.Font = New Font("Georgia", 16)
Background and Foreground
BackColor and ForeColor properties are used to set background and foreground color of a ListView respectively. If you click on these properties in Properties window, the Color Dialog pops up.
Alternatively, you can set background and foreground colors at run-time. The following code snippet sets BackColor and ForeColor properties.
ListView1.BackColor = System.Drawing.Color.Orange
ListView1.ForeColor = System.Drawing.Color.Black
The new ListView with background and foreground looks like Figure 3.
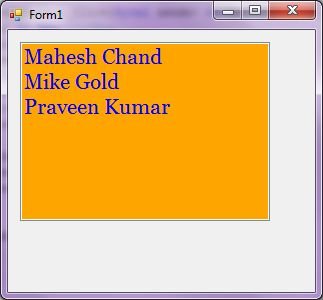
Figure 3
You can also set borders style of a ListView by using the BorderStyle property. The BorderStyle property is represented by a BorderStyle enumeration that has three values â€" FixedSingle, Fixed3D, and None. The default value of border style is Fixed3D. The following code snippet sets the border style of a ListView to FixedSingle.
ListView1.BorderStyle = BorderStyle.FixedSingle
ListView Items
The Items property is used to add and work with items in a ListView. We can add items to a ListView at design-time from Properties Window by clicking on Items Collection as you can see in Figure 4.
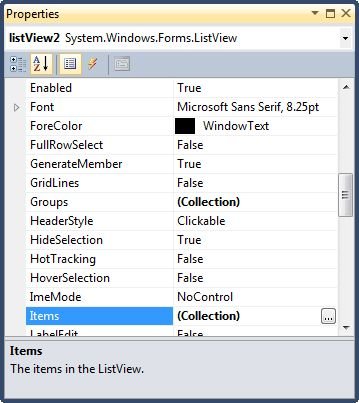
Figure 4
When you click on the Collections, the ListView Collection Editor window will pop up where you can type strings. Each line added to this collection will become a ListView item. I add four items as you can see from Figure 5.
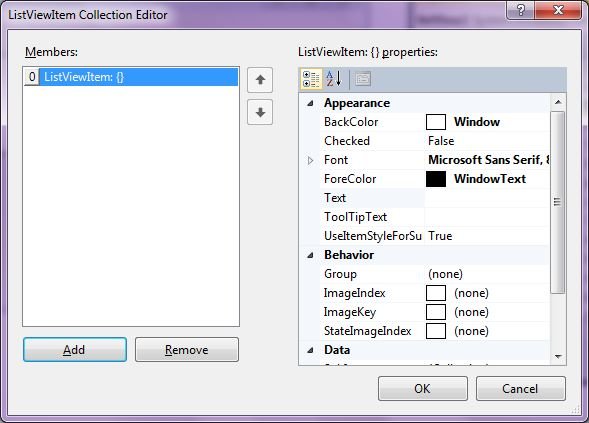
Figure 5
The ListView looks like Figure 6.
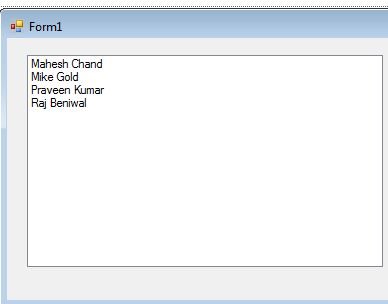
Figure 6
You can add same items at run-time by using the following code snippet.
ListView1.Items.Add("Mahesh Chand")
ListView1.Items.Add("Mike Gold")
ListView1.Items.Add("Praveen Kumar")
ListView1.Items.Add("Raj Beniwal")
Getting All Items
To get all items, we use the Items property and loop through it to read all the items. The following code snippet loops through all items and adds item contents to a StringBuilder and displays in a MessageBox.
Private Sub GetItemsButton_Click(ByVal sender As System.Object, _
ByVal e As System.EventArgs) Handles GetItemsButton.Click
Dim sb As New System.Text.StringBuilder Dim item As ListViewItem
For Each item In ListView1.Items
sb.Append(item.Text.ToString())
sb.Append(" ")
Next
MessageBox.Show(sb.ToString())
End Sub
Selected Text and Item
Text property is used to set and get text of a ListView. The following code snippet sets and gets current text of a ListView.
MessageBox.Show(ListView1.Text)
Sorting Items
The Sorting property and Sort methods are used to apply sorting on a ListView control. The Sorting property sets the kind of sorting applies to the items and Sort method forces the sorting.
ListView1.Sorting = SortOrder.Ascending
ListView1.Sort()
Summary
In this article, we discussed discuss how to create a ListView control in Windows Forms. After that, we saw how to use various properties and methods. I am planning to extend this article to add more topics including multiple columns, multiple views, header with images and so on.