A RichTextBox control is an advanced text box that provides text editing and advanced formatting features including loading rich text format (RTF) files.
In this article, I will demonstrates how create and use various features of Windows Forms RichTextBox control.
Creating a RichTextBox
We can create a RichTextBox control using a Forms designer at design-time or using the RichTextBox class in code at run-time.
To create a RichTextBox control at design-time, you simply drag and drop a RichTextBox control from Toolbox onto a Form in Visual Studio. Once a RichTextBox is added to a Form, you can move it around and resize it using mouse and set its properties and events.
Creating a RichTextBox control at run-time is merely a work of creating an instance of RichTextBox class, set its properties and add RichTextBox class to the Form controls.
First step to create a dynamic RichTextBox is to create an instance of RichTextBox class. The following code snippet creates a RichTextBox control object.
Dim dynamicRichTextBox As New RichTextBox()
In the next step, you may set properties of a RichTextBox control. The following code snippet sets size, location, background color, foreground color, Text, Name, and Font properties of a RichTextBox.
dynamicRichTextBox.Location = New Point(20, 20)
dynamicRichTextBox.Width = 300
dynamicRichTextBox.Height = 200
' Set background and foreground
dynamicRichTextBox.BackColor = Color.Red
dynamicRichTextBox.ForeColor = Color.Blue
dynamicRichTextBox.Text = "I am Dynamic RichTextBox"
dynamicRichTextBox.Name = "DynamicRichTextBox"
dynamicRichTextBox.Font = New Font("Georgia", 16)
Once a RichTextBox control is ready with its properties, next step is to add the RichTextBox control to the Form. To do so, we use Form.Controls.Add method. The following code snippet adds a RichTextBox control to the current Form.
Controls.Add(dynamicRichTextBox)
RichTextBox control looks like Figure 1.
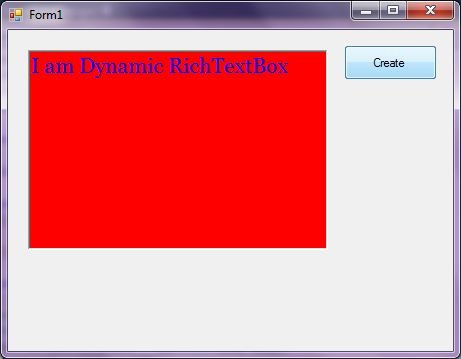
Figure 1
Setting RichTextBox Properties
After you place a RichTextBox control on a Form, the next step is to set properties.
The easiest way to set properties is from the Properties Window. You can open Properties window by pressing F4 or right click on a control and select Properties menu item. The Properties window looks like Figure 2.
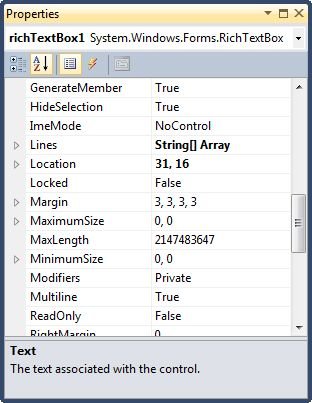
Figure 2
Location, Height, Width, and Size
The Location property takes a Point that specifies the starting position of the RichTextBox on a Form. The Size property specifies the size of the control. We can also use Width and Height property instead of Size property. The following code snippet sets Location, Width, and Height properties of a RichTextBox control.
dynamicRichTextBox.Location = New Point(20, 20)
dynamicRichTextBox.Width = 300
dynamicRichTextBox.Height = 200
Background, Foreground, BorderStyle
BackColor and ForeColor properties are used to set background and foreground color of a RichTextBox respectively. If you click on these properties in Properties window, the Color Dialog pops up.
Alternatively, you can set background and foreground colors at run-time. The following code snippet sets BackColor and ForeColor properties.
dynamicRichTextBox.BackColor = Color.Red
dynamicRichTextBox.ForeColor = Color.Blue
You can also set borders style of a RichTextBox by using the BorderStyle property. The BorderStyle property is represented by a BorderStyle enumeration that has three values â€" FixedSingle, Fixed3D, and None. The default value of border style is Fixed3D. The following code snippet sets the border style of a RichTextBox to FixedSingle.
dynamicRichTextBox.BorderStyle = BorderStyle.FixedSingle
Name
Name property represents a unique name of a RichTextBox control. It is used to access the control in the code. The following code snippet sets and gets the name and text of a RichTextBox control.
dynamicRichTextBox.Name = "DynamicRichTextBox"
Text and TextLength
Text property of a RichTextBox represents the current text of a RichTextBox control. The TextLength property returns the length of a RichTextBox contents.
The following code snippet sets and gets the Text and TextLength properties and gets the size of a RichTextBox control.
dynamicRichTextBox.Text = "I am Dynamic RichTextBox"
Dim len As Integer = dynamicRichTextBox.TextLength
Append Text
One way to append text to a RichTextBox is simply set Text property to current text plus new text you would want to append something like this.
RichTextBox1.Text += " Appended text"
RichTextBox also has the ApendText method to do the same. The AppendText method appends text at the end of a RichTextBox. The following code snippet uses AppendText method to append text to the RichTextBox1 contents.
RichTextBox1.AppendText(" Appended text")
AcceptsTab
If a RichTextBox control is set to multiline, the AcceptsTab property is used to set so the RichTextBox control accepts TAB key. If this property is not set, pressing TAB key simply move to the next control on a Form. By default, AcceptsTab property value of a RichTextBox control is false.
dynamicRichTextBox.AcceptsTab = True
WordWrap
If WordWrap property is true, the text in the RichTextBox control automatically wraps to the next line if required. If this property is set to true, horizontal scroll bars are not displayed regardless of the ScrollBars property setting.
dynamicRichTextBox.WordWrap = True
ScrollBars
A Multiline RichTextBox control can have scrollbars. The ScrollBars property of RichTextBox control is used to show scrollbars on a control. The ScrollBars property is represented by a RichTextBoxScrollBars enumeration that has four values â€" Both, Vertical, Horizontal, and None.
The following code snippet makes both vertical and horizontal scrollbars active on a RichTextBox control and they will be visible when the scrolling is needed on a RichTextBox control.
dynamicRichTextBox.ScrollBars = RichTextBoxScrollBars.Both
Font
Font property represents the font of text of a RichTextBox control. If you click on the Font property in Properties window, you will see Font name, size and other font options. The following code snippet sets Font property at run-time.
dynamicRichTextBox.Font = New Font("Georgia", 16)
Maximum Length
You can restrict number of characters in a RichTextBox control by setting MaxLength property. The following code snippet sets the maximum length of a RichTextBox to 50 characters.
dynamicRichTextBox.MaxLength = 50
ReadOnly
You can make a RichTextBox control read-only (non-editable) by setting the ReadOnly property to true. The following code snippet sets the ReadOnly property to true.
dynamicRichTextBox.ReadOnly = True
Enabling and Disabling Shortcuts
ShortcutsEnabled property of the RichTextBox is used to enable or disable shortcuts. By default, shortcuts are enabled. The following code snippet disables shortcuts in a RichTextBox.
dynamicRichTextBox.ShortcutsEnabled = False
ShortcutsEnabled property applies to the following shortcut key combinations:
- CTRL+Z
- CTRL+E
- CTRL+C
- CTRL+Y
- CTRL+X
- CTRL+BACKSPACE
- CTRL+V
- CTRL+DELETE
- CTRL+A
- SHIFT+DELETE
- CTRL+L
- SHIFT+INSERT
- CTRL+R
Read RichTextBox Contents
The simplest way of reading a RichTextBox control contents is using the Text property. The following code snippet reads contents of a RichTextBox in a string.
Dim RichTextBoxContents As String = dynamicRichTextBox.Text
In a multiline RichTextBox, if the RichTextBox contents are separated by multiple lines and you want to read contents of a RichTextBox line by line, you can use the Lines property of the RichTextBox. The Lines property returns an array of strings where each element of the returned array is a line.
The following code snippet reads a RichTextBox contents line by line.
Dim allLines() As String = dynamicRichTextBox.Lines
For lineCounter = 0 To allLines.GetUpperBound(0)
MessageBox.Show(allLines(lineCounter))
Next
Selection in RichTextBox
SelectedText property returns the selected text in a RichTextBox control.
Dim selectedText As String = dynamicRichTextBox.SelectedText
You may also use SelectionStart and SelectionLength properties to get and set the selected text in a RichTextBox. The SelectionStart property represents the starting index of the selected text and SelectionLength property represents the number of characters to be selected after the starting character. The following code snippet sets the selection on a RichTextBox.
dynamicRichTextBox.SelectionStart = 10
dynamicRichTextBox.SelectionLength = 20
Clear, SelectAll and Deselect All
Clear method removes the contents of a RichTextBox. The following code snippet uses Clear method to clear the contents of a RichTextBox.
dynamicRichTextBox.Clear()
RichTextBox class provides SelectAll and DeselectAll methods to select and deselect all text of a RichTextBox control. The following code snippet shows how to use SelectAll and DeselectAll methods.
dynamicRichTextBox.SelectAll()
dynamicRichTextBox.DeselectAll()
Summary
A RichTextBox control accepts user input on a Form and provides rich text features. In this article, we discussed discuss how to create a RichTextBox control in Windows Forms at design-time as well as run-time. After that, we saw how to use various properties and methods.