A NumericUpDown control allows users to provide a spin (up/down) interface to move through pre-defined numbers using up and down arrows. In this tutorial, we will see how to create a NumericUpDown control at design-time as well as at run-time.
Creating a NumericUpDown
We can create a NumericUpDown control using the Forms designer at design-time or using the NumericUpDown class in code at run-time (also known as dynamically).
Design-time
To create a NumericUpDown control at design-time, you simply drag and drop a NumericUpDown control from Toolbox to a Form in Visual Studio. After you drag and drop a NumericUpDown on a Form, the NumericUpDown looks like Figure 1. Once a NumericUpDown is on the Form, you can move it around and resize it using mouse and set its properties and events.
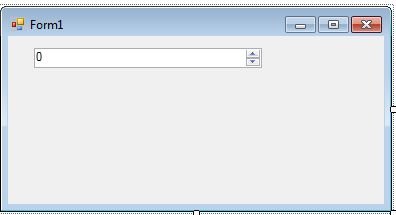
Figure 1
Run-time
Creating a NumericUpDown control at run-time is merely a work of creating an instance of NumericUpDown class, set its properties and adds NumericUpDown class to the Form controls.
First step to create a dynamic NumericUpDown is to create an instance of NumericUpDown class. The following code snippet creates a NumericUpDown control object.
Dim dynamicUpDown As New NumericUpDown()
In the next step, you may set properties of a NumericUpDown control. The following code snippet sets location, size and Name properties of a NumericUpDown.
this.numericUpDown1.Location = New System.Drawing.Point(26, 12)
this.numericUpDown1.Name = "numericUpDown1"
this.numericUpDown1.Size = New System.Drawing.Size(228, 20)
this.numericUpDown1.TabIndex = 0
Once the NumericUpDown control is ready with its properties, the next step is to add the NumericUpDown to a Form. To do so, we use Form.Controls.Add method that adds NumericUpDown control to the Form controls and displays on the Form based on the location and size of the control. The following code snippet adds a NumericUpDown control to the current Form.
Me.Controls.Add(this.NumericUpDown1)
Setting NumericUpDown Properties
After you place a NumericUpDown control on a Form, the next step is to set its properties.
The easiest way to set properties is from the Properties Window. You can open Properties window by pressing F4 or right click on a control and select Properties menu item. The Properties window looks like Figure 2.
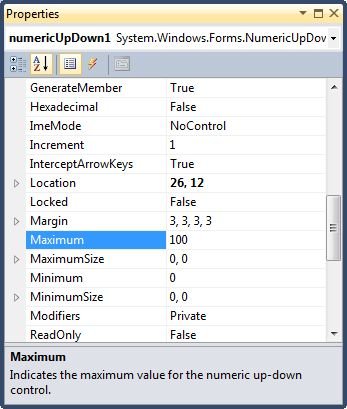
Figure 2
Name
Name property represents a unique name of a NumericUpDown control. It is used to access the control in the code. The following code snippet sets and gets the name and text of a NumericUpDown control.
dynamicUpDown.Name = "DynamicUpDownButton"
Location, Height, Width and Size
The Location property takes a Point that specifies the starting position of the NumericUpDown on a Form. You may also use Left and Top properties to specify the location of a control from the left top corner of the Form. The Size property specifies the size of the control. We can also use Width and Height property instead of Size property. The following code snippet sets Location, Width, and Height properties of a NumericUpDown control.
dynamicUpDown.Location = New System.Drawing.Point(12, 50)
dynamicUpDown.Width = 200
dynamicUpDown.Height = 25
Font
Font property represents the font of text of a NumericUpDown control. If you click on the Font property in Properties window, you will see Font name, size and other font options. The following code snippet sets Font property at run-time.
dynamicUpDown.Font = New Font("Georgia", 12)
Foreground and Background
ForeColor and BackColor properties represent foreground and background colors of a control. The following code snippet sets the background and foreground colors of a control.
dynamicUpDown.ForeColor = Color.Orange
dynamicUpDown.BackColor = Color.Black
Current Value
The Value property represents the currently selected value in a control. The following code snippet sets and gets the Value properties at run-time.
dynamicUpDown.Value = 10
MessageBox.Show(dynamicUpDown.Value.ToString())
Minimum and Maximum Range
Minimum and Maximum properties are used to set the minimum and maximum values of a NumericUpDown control. The following code snippet sets the minimum and maximum properties at run-time.
dynamicUpDown.Minimum = -10
dynamicUpDown.Maximum = 10
Acceleration and Increment
Accelerations property can be used to move through a set of values when up and down buttons are clicked in a NumericUpDown control.
Increment property is used to set the value that is increased or decreased when up and down buttons are clicked. The following code snippet sets the Increment and adds accelerations.
dynamicUpDown.Increment = 5
dynamicUpDown.Accelerations.Add(New NumericUpDownAcceleration(2, -5))
Decimal Places
We can format the number of a NumericDropDown control using the DecimalPlaces property. The following code snippet formats the number that displays 4 decimal values.
dynamicUpDown.DecimalPlaces = 4
HexaDecimal
We can use a NumericDropDown control to display number value in hexadecimal format. The following code snippet formats the number in hexadecimal.
dynamicUpDown.Hexadecimal = True
Summary
In this article, we discussed discuss how to create a NumericUpDown control in Windows Forms at design-time as well as run-time. After that, we saw how to use various properties and methods.